April update

Dear Readers

Lots of things seem to have happened this month, so let me start by passing on a new email address for Nina Miklin. She’s had to change it very quickly to nina.a.miklin@gmail.com If you’ve tried to get in touch with Nina in the past month or so, please make contact with her again especially if you wanted to take up her recent yarn offer. Full details are on Page 18 of the April magazine and the offer remains open until 30th April, or while stocks last. There are savings of almost £20, but you won’t get through to her unless you use her new email address or visit www.exclusiveyarns.co.uk

I need to let you know that almost all the Forsell yarn, on special reader offer at Silver Viscount, has now been sold. There may be an odd cone or two tucked away, so it’s worth calling Jackie on 01933-311888 just to double check. In its place, Silver Viscount will now stock three qualities of Yeoman Yarns. There are 16 shades of Sari 3-ply, 20 shades of DK Cotton and 29 shades of 4-ply Soft Cotton all on 400g cones. For more details about the yarn, call Jackie or ring Yeoman Yarns direct on 0116-240 4464. To see how to knit and use Yeoman Yarns on Silver Reed machines, @yeomanyarns is the place to go.

Do please read about the Machine Knit Community on Page 11. It’s an exceptional online space for machine knitters of all abilities, helping us to get the most from our machines. Nic Corrigan is a designer with a studio in West Yorkshire. She offers step-by-step classes, modern designer-level knitting patterns and an online support network. You’ll find her at www.machineknit.community and it’s a place to meet and be inspired by other machine knitters from all over the world. I’m sure we’ll hear more from Nic in the coming months.

I’ve had a number of calls from readers singing the praises of Tools With A Mission. TWAM is a Christian charity that collects unwanted tools and equipment including knitting machines, sewing machines, accessories and yarn. Items are refurbished and sorted into kits for Sub-Saharan Africa, where TWAM works closely with local grassroots organisations. To get someone started, a knitting machine kit includes a machine, yarn, patterns, all useful items and accessories. Similarly, sewing machine kits include a machine plus cottons, needles, zips, buttons and haberdashery. There’s a constant need for tools from gardens, garages and workshops plus computers and IT equipment. Visit the website at www.twam.uk to see what’s needed, find a volunteer collector or refurbishment centre. The head office is at 2 Bailey Close, Hadleigh Road Industrial Estate, Ipswich, Suffolk IP2 0UD. They’re open Monday to Friday from 9.00 am to 4.30 pm, but you must ring first. Their number is 01473-210220 or email post@twam.uk Instead of a trip to the tip, make TWAM your first port of call and help others to help themselves. Until next month, knit happy!

NEXT ISSUE June 2022

Subscription copies sent out Thursday 5th May

On sale Thursday 12th May

Ask your newsagent to reserve a copy, or order a subscription now

March update

Dear Readers

One thing has gladdened my heart this month, so please read Clubline on Page 10. There’s a young boy in Prestonpans, not far from Edinburgh, Leith and Musselburgh who is passionate about learning to machine knit. One slight problem is that his learning curve has started on a somewhat elderly Passap Duo 80. Do you, or does anyone you know, live in the area and knit on one of these machines? I’d love to find an experienced knitter within reasonable travelling distance to help him. I’ve spoken to his father at length and we’ve tried all the usual lines of enquiry, but drawn a blank. I’m hopeful, therefore, that my letter will reach a wider audience.

I’ve also wondered if someone in the area might have a punchcard machine that’s no longer used, to get him a bit more up-to-date? We may grind to a halt with the Duo 80, but could we help to satisfy some of his passion for our craft by donating an unwanted Brother or Knitmaster punchcard machine and showing him how to use it? Obviously a weekly commute from Land’s End to Prestonpans is out of the question, but could one of you living not too far away offer any help, please? His family has a farming background, so pure wool is his yarn of choice. Have you any cones of wool you could give him to try? It’s rare to find such enthusiasm in one so young and I’d like to do all I can to help. One day he’ll perhaps become a famous knitwear designer and we’ll all be so proud of helping him onto the first rung of the ladder. If you think you can help or have any other ideas, do please get in touch with me.

I’d now like to mention the group of textile artists based in the East Midlands and known as The Living Threads Group. Their 20th exhibition is to take place just before Easter at Trent College in Derby Road, Long Eaton. For inspiration in fabric and thread, it would make a lovely day out. The dates are 30th March to 8th April and the venue is the Obolensky Building at Trent College, Derby Road, Long Eaton, NG10 4AD. Opening times are 10.00 am to 4.00 pm and admission is £5. There are daily demonstrations, free parking, a Textile Artists’ shop and refreshments. Find out more at www.livingthreadstextileartists.com

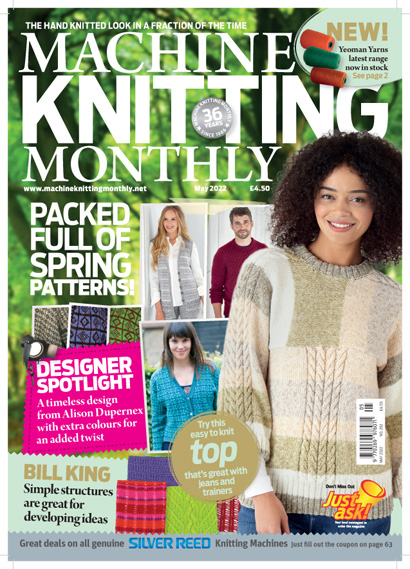
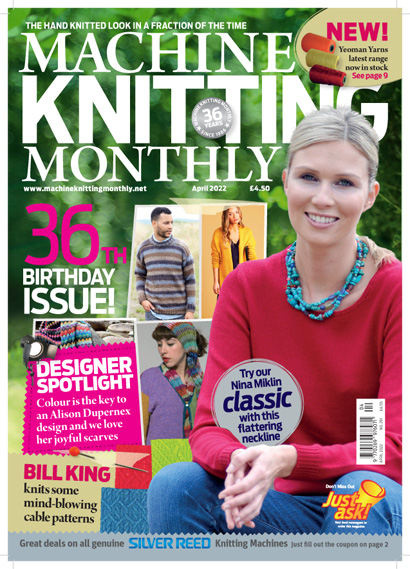
This month we’ve reached another milestone, as we celebrate our 36th birthday. Whilst I can take some of the credit, we’re still going strong because of your fantastic support. Despite two years of lockdowns and a worldwide pandemic, we’ve kept our craft going so please accept my very sincere thanks. It’s now time to turn to Page 30 and immerse yourself in this month’s wonderful selection of joyous colours and patterns brought to us by Alison Dupernex. With Spring on the way, it really is time to knit happy!

NEXT ISSUEMay 2022

Subscription copies sent out Thursday 7th April

On sale Thursday 14th April

Ask your newsagent to reserve a copy or order a subscription now!

Green for go

Dear Anne

My friend is having trouble knitting her garments and they all appear to be a different size. She does not use the Green Ruler and my question is would you be so kind as to explain this to me and I will pass it on to her. I haven’t been machine knitting for some time as I looked after my dad until he passed, then we moved house and just recently I had a bad fall so everything is on the back burner for now. Many thanks, Janice

Thanks for asking Janice and the Green Ruler is an excellent way of measuring the stitch and row tension of machine knitted swatches. It’s as accurate as most machine knitters require and can be used on all machines. A while ago, Sally Butcher wrote to say:-

Dear Anne

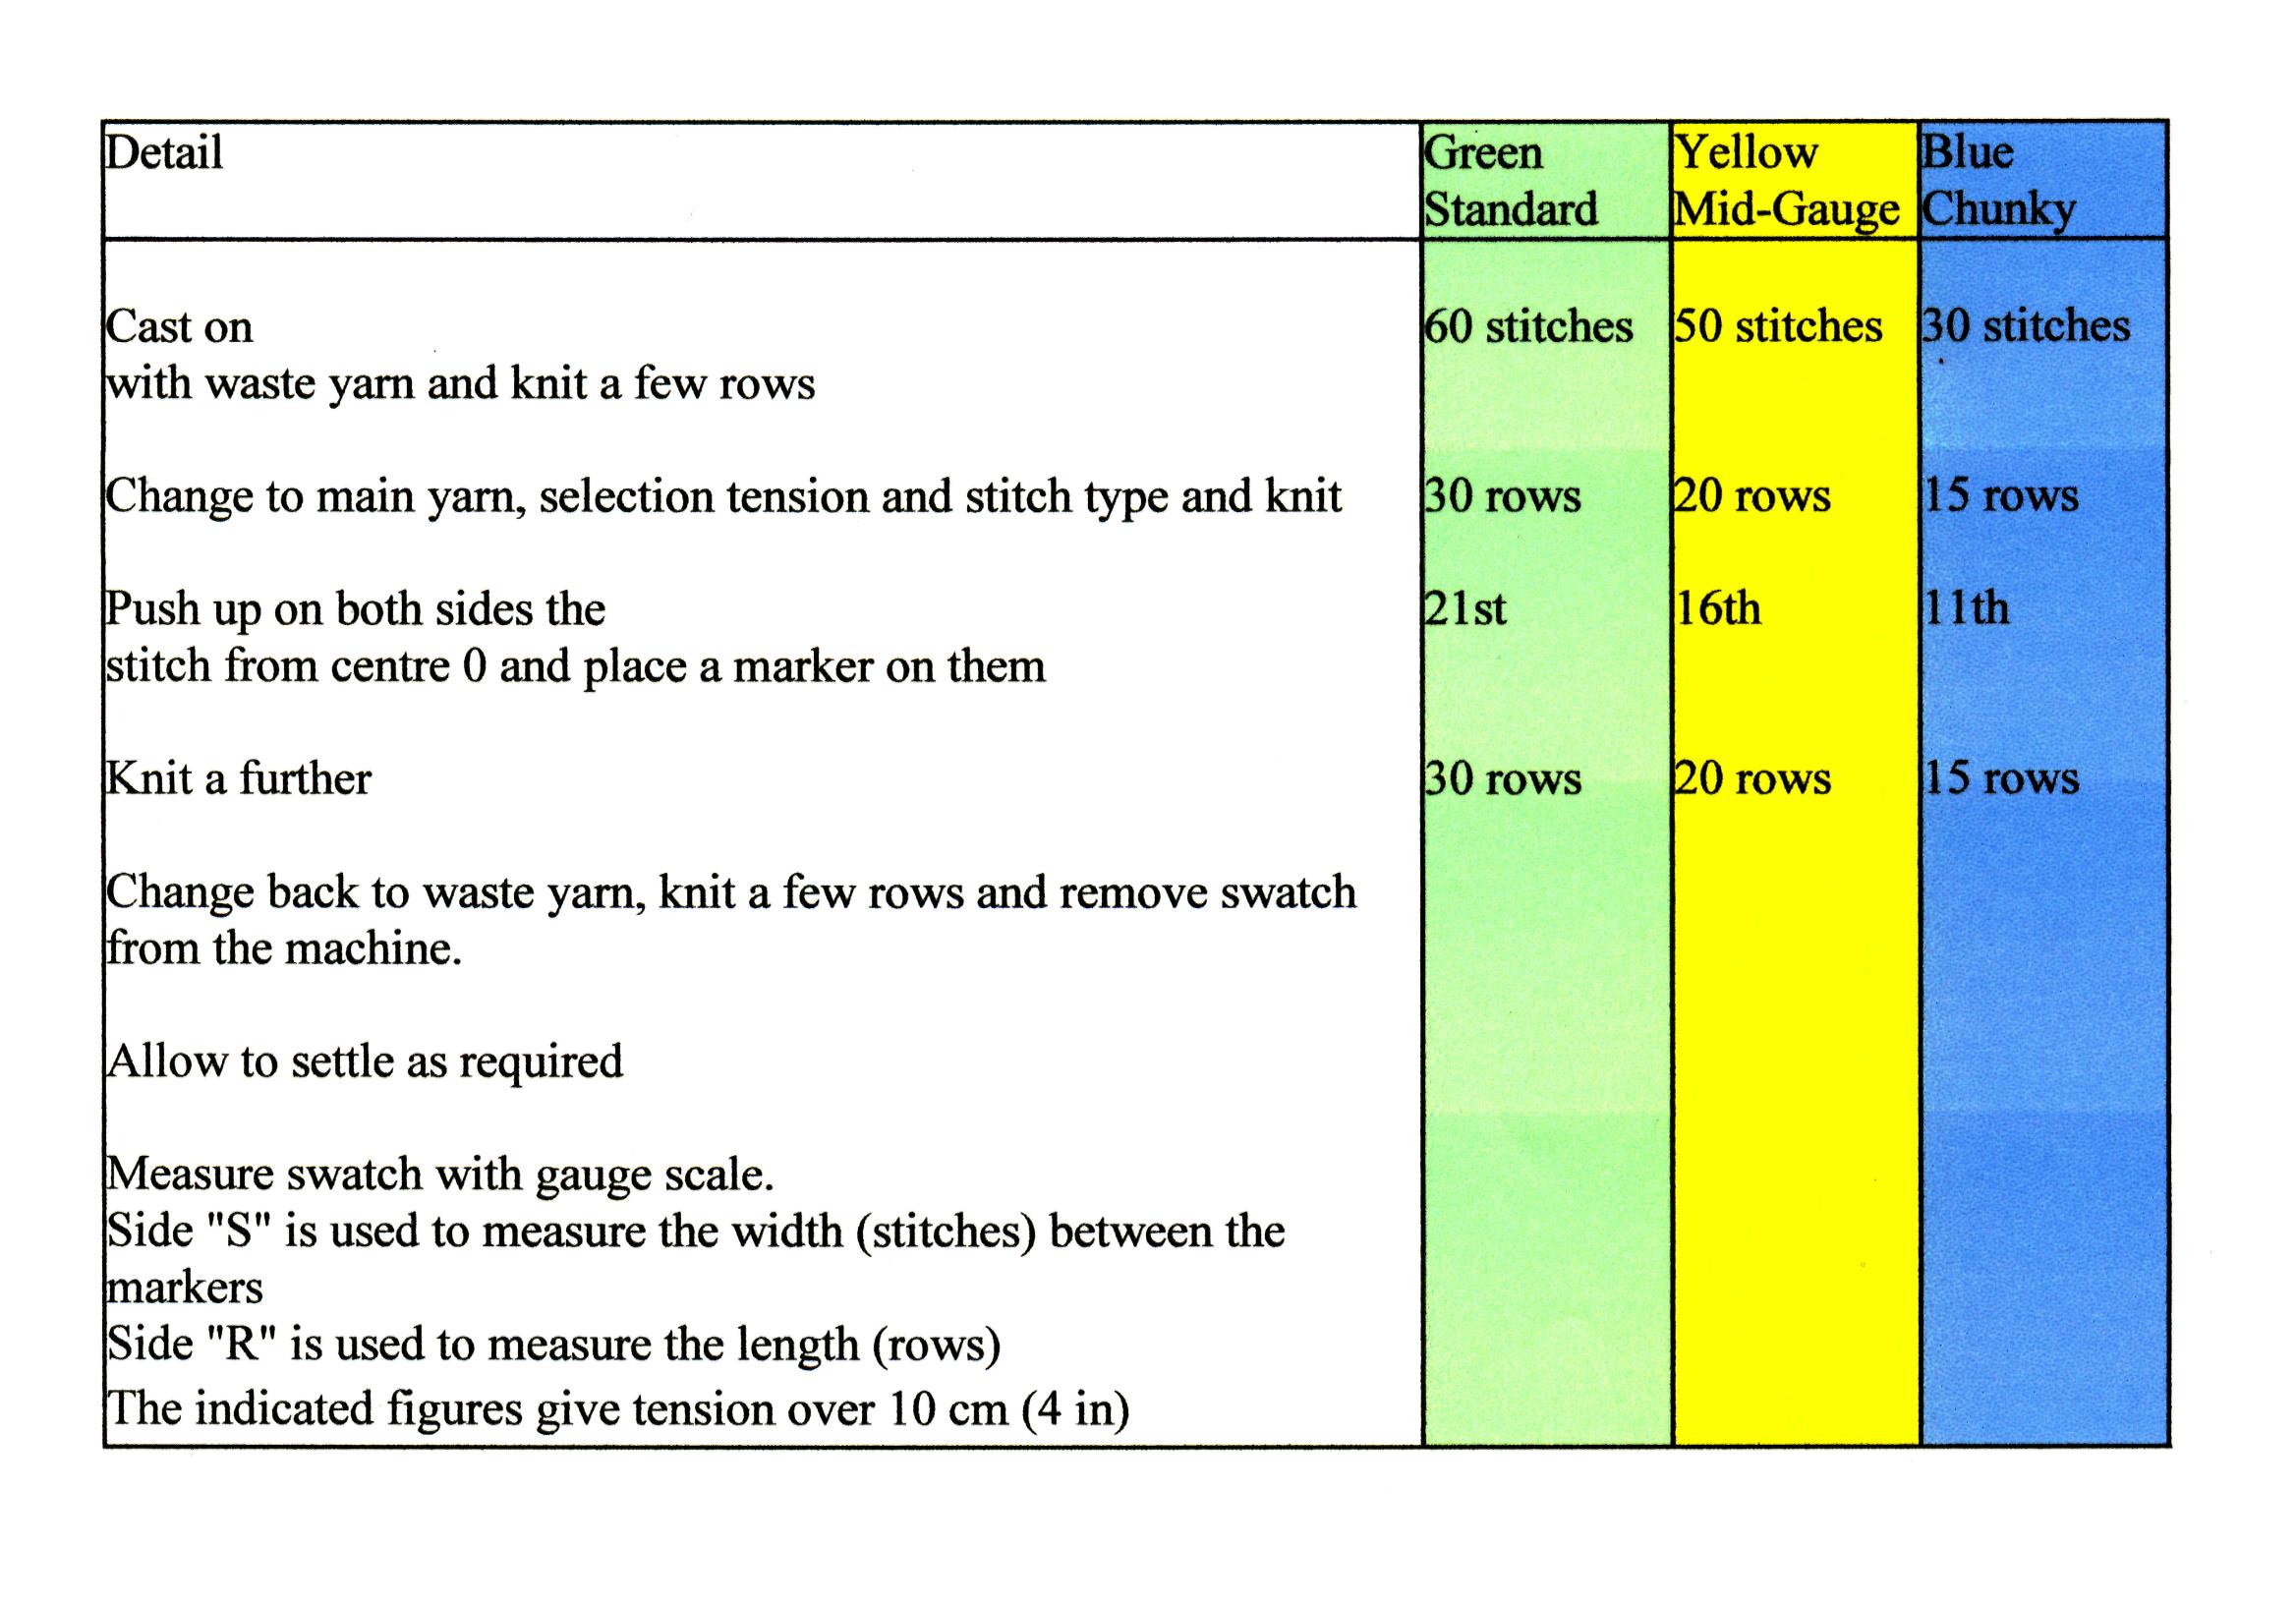
My chosen method of tension swatch measuring is to use the coloured rulers, as I’ve always been a Silver Reed (Knitmaster) fan and these were supplied with the machines. The three colours are used on the different gauge machines; green is for standard, yellow is for mid-gauge machines and blue is for chunky. They have different scales and are designed to measure different quantities of stitches and rows. It’s important to get this right in order to get an accurate swatch measurement.

• Green (standard) measures over 40 stitches and 60 rows.

• Yellow (mid-gauge) measures over 30 stitches and 40 rows.

• Blue (chunky) measures over 20 stitches and 30 rows.

I drew up a little table which I’ve printed off several times and laminated. I keep one with each machine and I’m happy for you to print it. With best wishes, Sally Butcher

Sally is one of our Knitting Buddies and she runs a club in Bodmin, Cornwall. She also has video demonstrations on her Facebook page, showing techniques on the SK280, LK150 and SK155 Silver Reed machines. The link is https://www.youtube.com/channel/UCSDxy6pQHAs4gd5XBztYWmw and it’s called Sally Butcher’s Kalamunda Krafts Machine Knitting.
No-sew

Dear Anne

I’m enclosing details, which may help knitters like me, who hate sewing and particularly backstitching through the neckband on the right side. I could never get it neat enough. This method doesn’t need to be stitched at all, which suits me fine. Maybe if you’ve a little space you could print it to help others, who aren’t so good at sewing! Yours sincerely, Lorraine in Colwyn Bay

1. Work over width of sts around neck, such as 130 arranged as 65-0-65.

2. Knit about 7 to 9 rows with WY. Carriage at left. K 1 row with nylon cord. Carriage at right.

3. K 4 rows in MY and 1 row on alt Ns in HP. Set carriage to slip both ways. Don’t set carriage to hold. Use MT such as Tension Dial setting 6.

4. Transfer sts to ribber, or use garter carriage with Pattern 532 for 1×1 rib. Put in comb and hang weights carefully if transferring.

5. Using MT-4, K 30 rows in 1×1 rib or use Pattern 532 on garter carriage. Transfer to main bed.

6. Pick up loops of 5th row of main yarn onto alt Ns. K 5 rows at MT.

7. Pick up first row (the one after the cord) and K 1 row at MT. Pick up neckline sts with wrong side facing you and K 1 row. Cast off using MT.

Cut ‘n’ sew

Dear Anne

I’ve just read in an old magazine the method of using the cut and sew neckline for Passap machines. When I was studying for my City & Guilds Certificate, I was shown a method for Japanese machines that doesn’t involve putting the garment on the bed of the machine. I think it was Carol Hocknell who showed us, but I can’t be sure so I apologise in advance if I’ve made a mistake. I’ve attached the method and you’ve probably seen it before but if not, perhaps you could use it in the magazine? Thank you for a great read every month and you must be tired of hearing it, but please keep the good work going if you can. King regards, Joan in Northampton

Join one shoulder, cut and sew the neck, find out how many stitches are needed for the rib and knit as follows.

1. Start rib on MT-2 or MT-3.

2. Knit first row and hang ribber comb.

3. Don’t knit any circular rows, as this makes it much easier to pick up these stitches.

4. Knit as many rows for the rib as you normally do, decreasing the tension and increasing again as you wish.

5. Transfer stitches to main bed, take off machine on waste yarn leaving a long thread of rib yarn for casting off.

6. With right side facing hang neckline on needles, pulling it behind latches.

7. Pick up last of row of rib before waste yarn, but not taking stitches behind latches.

8. You now have to pull these stitches through the cut and sew neck, so make sure all latches are closed and use a long tool. I use my ribber comb and pull the stitches through the neckline all in one go.

9. Pick up the cast on row of rib, ‘sandwiching’ the cut and sew between. There are now two stitches on every needle, so cast off behind the sinker posts using the long thread.

10. Join remaining shoulder and mattress stitch the neck seam.

Feel the width

Dear Anne

I’ve noticed you say on ribbed edges that it’s often easier to cast on with waste yarn, then pick up the stitches and hand knit the ribs downwards. Well, what do we ‘plus sizes’ do in tuck stitch patterns? It’s a great stitch for giving us the maximum width but tuck stitch patterns often have less stitches, so the ribs can be very tight and unwearable. Any suggestions please? Debbie in Northampton

Thanks for your query Debbie and here’s what to do.

Step 1 Knit the rib over the usual number of stitches required for your size. This will almost certainly be more than for the main tuck stitch garment.

Step 2 Transfer the stitches to the main bed, using main tension knit one row then remove the rib on waste yarn.

Step 3 Replace the stitches on the correct number of needles required for the pattern, decreasing evenly across, then continue to knit in pattern, as usual. This is also useful for anyone who doesn’t like a tight band of rib pulling in, say, the lower edge or cuff of a cardigan or jacket.

Help please


Hi there, I have just bought a secondhand Brother KH881 knitting machine with ribber (I’ve used a Passap many moons ago) and am trying to convert a hand-knit pattern for a beret for a toy. The hand-knitting pattern is: Cast on 54 sts, knit 6 rows in k1 p1 rib. Next row: K3 inc in next stitch, then k2 inc in next stitch across the row to the end. Then knit around 16 rows, then decrease the top by k5 k2tog across the row, purl one row, then K4 k2tog across the row, purl one row etc. etc. until about 8 sts left. I have tried doing the rib on the machine, taking off with waste yarn, and putting back with the increasings which took ages, but then, when I tried the top bit it was just so so fiddly I gave up. Can someone help me with how to make this beret please ? I make little toys from socks, called SOCKIES and one of my best sellers is the camouflage army ones, but it is very time consuming knitting all the hats, but so far, the machine I bought hasn’t helped me, so getting a bit upset about it all ! Thanks, Julie

Double up

Dear Anne

I so enjoy reading the hints and tips, but haven’t seen this one mentioned for ages. Back in the day, when we were all too scared to put a pair of scissors anywhere near our knitting, one of the cut ‘n’ sew enthusiasts passed on a gem. When you have to work a zigzag stitch on your sewing machine for a cut and sew neckline, use a double sewing machine needle. The job’s done in half the time! Best wishes, Grace in Stockport

One direction

Dear Anne

Have you a magic trick up your sleeve for getting needles back to working position from holding position. I don’t mean upper working, when you can set the carriage but from right out to right back. It’s such a fiddle doing it all one by one and please don’t say use a treble or 7-prong tool. Dropsy is my middle name and I can never get more than one safely back from the transfer tool, so it has to be one at a time. Thanks for any help, Sheila in Walsall

Thanks for writing Sheila and it won’t work every time, but try this if the pattern allows. It’s especially useful when we’ve pushed all needles to holding position to knit one side of the neck and need them all back in work to knit the other side. Reset the pattern card if necessary. Push the needles in hold to upper working position and knit one row across using a spare piece of yarn or the ravel cord. It’s a simple matter to pull out the cord and unpick the stitches. We now have the needles in working position, the carriage is on the correct side for knitting and the pattern is also memorised at the same time.

Chill out

Hello Anne

I hope this email finds you fit and well and thank you for the mention in the March edition of MKM. It’s brilliant of you and thanks also for the article on full needle ribs. I’m as indecisive as ever and know I’ll just have to try to do them. In the meantime, I’ve been asked to knit some mittens for children. It’s many years since I’ve done mittens and I can’t fully remember how the thumb was done. All the patterns now seem to be for hand knitting so is there any way you could help me again, please? Keep up the good work and many, many thanks, Marilyn

We surprised ourselves, Marilyn at just how long ago we may have published a straightforward pattern for children’s mittens, so here’s a stash box knit. Knit them on any standard gauge machine with a ribber or work ribs in mock rib. You’ll need an oddment of 3-ply wool or fine 4-ply plus safety pins and stitch holders. The tension is fairly tight, to keep the child’s hands nice and warm.

Measurements Length 16 [17.5, 19] cm, 6½ [7, 7½] in.

Tension 30 stitches and 44 rows to 10 cm, 4 in measured over stocking stitch with tension dial around 5.

RIGHT MITTEN With carriage at right and using MY, cast on 36 [40, 44] sts at centre of machine in 1×1 rib. K 5 tubular rows. Carriage is at right. Set machine for 1×1 rib knitting. Set RC at 000. Using MT-3/MT-3, K 24 rows. Transfer sts for st st. Set RC at 000. Using MT, K 2 rows. Shape sides by inc 1 st (2 sts in) at each end on next and every foll 4th row until there are 44 [48, 52] sts. K 3 rows. K 1 row extra for Left Mitten *.

** Thumb opening Using a length of WY, K 7 [8, 9] sts at extreme left as for a buttonhole. K 20 [24, 28] rows. Shape top Push 22 [24, 26] Ns at left to HP. Cont on rem sts. When shaping in HP, always take yarn round first inside N in HP to prevent a hole forming and push 1 N at opposite end to carriage to HP on next 10 [12, 14] rows. Break off yarn. Push Ns to HP. With carriage at left, push 22 [24, 26] Ns at left from HP to UWP. Push 1 N at opposite end to carriage to HP on next 10 [12, 14] rows. Break off yarn. Push all Ns from HP to UWP. K 1 row. Slip sts onto 2 stitch holders and graft. THUMB Place 7 [8, 9] st loops from thumb opening on 2 safety pins. Push 15 [17, 19] Ns to WP. With P side facing, replace sts from safety pins on to 7 [8, 9] Ns at each edge and pick up 1 st at centre. Using MY, K 18 [20, 22] rows. Break off yarn, leaving long end. Thread end through sts, release from machine, draw up sts and secure **.

LEFT MITTEN Work as for Right Mitten to * noting alteration in number of rows worked, then from ** to ** reversing shaping by reading right for left. Join side and thumb seams. Press.